Skip to Main Content

Edit Video: iMovie

What is iMovie?

  • iMovie is a basic, entry-level video editing software designed for use on Mac computers.

Download and install:

This guide is adapted from the iMovie Help Guide.

How do I create a new project?

  1. Select Projects.
  2. Click the large plus (+) and select "Movie." 

iMovie Projects page, creating a new project.

How to add media to my project?

To import media into iMovie from your photo library:

iMovie video editing pane with no media imported yet. Import media arrow highlighted.

  1. Open IMovie.
  2. Select File > Import Media
  3. Or Select the icon with the arrow facing down, located either along the top menu of the IMovie window or in the video media library pane. 
  4. Then select the clip or image you want to use from your files.

To start creating your video, do one of the following:

iMovie editing screen, dragging a clip into the timeline.

  • Insert the photo or video clip:
    1. Drag it to the timeline between clips or between a clip and a transition.
    2. As you drag, a blue box appears in the timeline, indicating where the photo or clip will appear in the timeline. 

  • Replace a clip:
    1. Drag the photo or clip on top of a clip in the timeline.
    2. As you drag, a white border will appear around the clip, along with a green plus sign. When you release the mouse button, choose Replace from the menu that appears. The photo or clip replaces the clip in the timeline. 

iMovie timeline replacing a clip

How do I edit clips?

Split a clip

  1. In the timeline, select the clip you want to split.
  2. Position the playhead where you want to split the clip.
  3. Choose Modify > Split Clip or Command + B.
  4. You can also right click where you've positioned the playhead and select 'Split Clip' from the menu that appears.

iMovie splitting a clip from the Modify menu

Move clips in the timeline

  1. In the timeline, select one or more clips, and drag them to a new location.
  2. Blue outlines appear in the timeline, indicating where the clips will appear.

Clip being dragged to new location in timeline

How do I add text to my video?

  1. With your movie open in the timeline, select Titles above the browser. Available title styles appear in the browser. If you’ve set a theme for your movie, titles related to the theme appear at the top of the browser. 
  2. Browse the titles to find the one you want to use, or use the search field to search for the name of a particular title. Many titles are animated, which means they move on the screen in an interesting way. Skim the title thumbnails in the browser to see how they move.

Browse the title list

  1. Do one of the following:
    • In the timeline, position the playhead where you want to add the title, and then double-click the title in the browser. The title is added to your movie at the position of the playhead.
    • Drag the title to the timeline, above the clip where you want the title to appear. If snapping is turned on (click the View menu and make sure Snapping has a checkmark next to it), the edges of the title align with clip and transition edges. As you drag, a vertical yellow line appears when either end of a title is aligned with either end of a clip.
    • Drag the title to the timeline, over the clip where you want it to appear. If you position the title in the first or last third of the clip, the title’s duration is automatically adjusted to appear in that third of the clip. If you position the title in the center of the clip, the title’s duration is adjusted to appear over the entire clip.

Editing and formatting text

  1. Select the title in the timeline, or move the playhead over the title.
  2. In the viewer, select the placeholder text by double-clicking it, and type the text you want to appear. Some title styles in the Sports theme appear in the viewer with pop-up menus, which you use to choose the team and player you want to appear in that title. For more information, see 'Specify team information' for the Sports theme.
  3. To change the title’s appearance (its font, color, size, style, or alignment), use the font controls above the viewer.

Note: You can’t change the font in certain theme-styled titles and some animated titles.

Editing slide text

How do I make the text only appear on some parts of the video

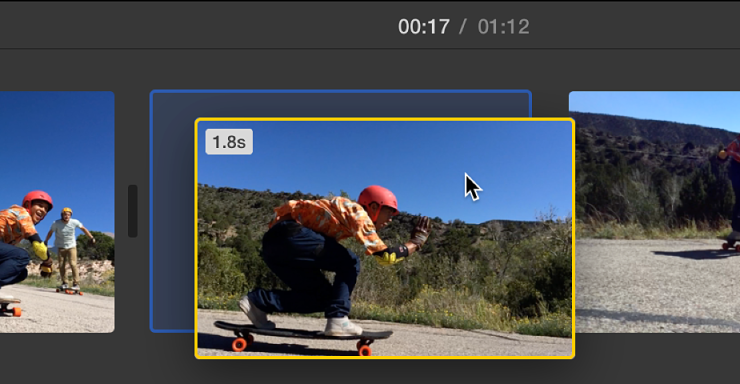
In the timeline, do one of the following:

  • Move your pointer to either edge of a title bar, and drag to lengthen or shorten the duration of the title.
  • Select the title, click the Clip Information button in the adjustments bar, and type a duration in the Duration field.

Adjust text length

How do I add an audio track to my project?

Add background music:

Upload Media

  1. Add music files you have on your computer by dragging and dropping files into "My Media". 
  2. Drag the clip to the background music well, located below where you movie sits in the timeline. You can position, trim, and edit the background audio independently of clips in the timeline. If you have “Trim background music” turned on in your movie settings, the audio in the background music well is automatically trimmed to match the duration of your movie.

Add Music from Apple Apps

  1. Select Audio & Video above the browser.
  2. In the sidebar, select Music. The contents of the selected item appear as a list in the browser. To filter what appears, click the menu in the upper-left corner of the browser and choose a category.
  3. A small selection of music can also be found under Sound Effects > Theme Music. 
  4. Browse to find the clip you want to add to your project.
  5. Drag the clip to the background music well, located below where you movie sits in the timeline. You can position, trim, and edit the background audio independently of clips in the timeline. If you have “Trim background music” turned on in your movie settings, the audio in the background music well is automatically trimmed to match the duration of your movie.

Note: Music may be protected and unavailable to use.

Add sound clips:

  1. Select Audio above the browser.
  2. In the sidebar, click Sound Effects. The contents of the selected item appear as a list in the browser. To filter what appears, click "Effects" in the upper-left corner of the browser and choose a category.
  3. In the browser, select an audio clip you want to add to your movie.
  4. Do one of the following:
    • Add the entire audio clip: Drag the clip from the list to the timeline.
    • Add part of the audio clip: Select a range in the waveform at the top of the browser, and drag the range to the timeline.
  5. The audio clip is now attached to a clip in the timeline. If you move the clip the audio clip is attached to, the audio clip moves as well.

Add sound effect. The sound effect appears below the video timeline.

How do I add transitions?

Add transitions between clips automatically:

  1. With your project open in the timeline, click Settings in the upper-right corner of the timeline, and then select the “Automatic content” checkbox. If you have applied a theme to your movie, iMovie inserts standard cross-dissolve transitions between clips, with occasional transitions based on the theme. Not every space between clips gets a transition. iMovie also adds a theme-styled opening title over the first clip and an end title over the last.
  2. To include only standard, non-themed transitions in your movie, click the Theme button, select No Theme, click Change, and then deselect the “Automatic content” checkbox. Note: If you already have a theme applied to your movie and select No Theme, all theme elements are removed from the movie. For more information about themes, see Set or change a movie’s theme.

Turn on automatic content

Add transitions between clips manually:

To add transitions manually, you must first turn off automatic transitions.

  1. With your movie open in the timeline, select Transitions above the browser. To preview a transition, skim it.
  2. Do one of the following:
    • Add a transition between two clips: Drag a transition between two clips in the timeline.
    • Add a transition to both ends of a clip: Select a clip in the timeline, then double-click a transition in the browser.

A transition icon appears between the clips.

Add a cross-dissolve transition between clips:

To add a cross-dissolve transition, in which the first shot fades out while the second shot fades in, you must first turn off automatic transitions. For more information, see Disable automatic transitions.

  1. In the timeline, click the edge of either clip you want to connect with a cross-dissolve.
  2. Choose Edit > Add Cross Dissolve (or press Command-T). A cross-dissolve transition appears between the two clips in the timeline. Note: If you select a clip in the timeline and choose Edit > Add Cross Dissolve, a cross-dissolve is added to both sides of the clip.

How do I apply the green screen effect?

When applying the green screen effect, it's important to import the background you want to use first, and then add in the video clip you want to apply the green screen effect to. Follow these steps to apply the green screen effect:

  1. Select 'Backgrounds' from the middle column menu of the IMovie window.
  2. Select a background to replace the green screen with: double-click your selection or directly drag the background or image into your project timeline. If you want to use a customized photo for your background, upload the photo as you would any other media to your project. See 'How do I add media to my project?'
  3. Drag the green screen footage over top of the background you've just added to your timeline.
  4. A blue tab will appear, along with a green plus sign, indicating that the footage is being placed on top of the background clip.
  5. You now need to select the clip you've placed over top of the background, which should highlight the clips outer edges in yellow.
  6. In the edit screen, select 'Video overlay settings,' which is the icon with two squares positioned on top of one another, and should be the last icon on the left hand side of the adjustments bar.
  7. From the drop-down menu that defaults to 'Cutaway,' select 'Green screen/Blue Screen.' This will automatically replace the background with the background colour or image you previously selected and imported into the timeline.
  8. You can use the Softness, and 'Clean-up tools' to make further adjustments to the green screen replacement for things like overexposure, for example.
  9. Check 'Reset' to revert the clip back to its original form.

Select Green/Blue Screen from the "Video Overlay Settings" dropdown menu

How do I stabilize shaky clips in my project?

  1. In the timeline, select the clip you want to stabilize.
  2. Select the 'Stabilize' icon in the clip editing window.
  3. Select the 'Stabilize shaky video' checkbox.
  4. To adjust the amount of stabilization needed for your clip, drag the stabilize shaky video slider.

Select Stabilize Shaky Video Option on the Stabalization menu

How do I share my video?

Share to YouTube:

Once you are finished your video, you can share your video directly to YouTube

  1. Click File > Share > YouTube
  2. In the dialog that appears, do any of the following:
    • Set the title of the shared movie: Click the name at the top, and type a new name.
    • Set the description of the shared movie: Click in the Description field, and type new text.
    • Set tags for the shared movie: Click in the Tags field, and type tag names separated by commas.
    • Set the resolution of the shared movie: Click the Resolution pop-up menu and choose an option.
      • Note: You can export a 4K clip or movie in its native resolution.
    • Set a YouTube video category for the shared movie: Click the Category pop-up menu and choose an option.
    • Set a YouTube privacy setting for the shared movie: Click the Viewable By pop-up menu and choose an option.
    • To learn more about the YouTube category and privacy settings, go to www.youtube.com.
  3. Click Next, sign-in to your YouTube account.
  4. Follow the instructions on screen to complete the upload process.

To a File:

  1. Click File > Share > File
  2. In the dialog that appears, do any of the following:
    1. Set the title of the shared movie: Click the name at the top, and type a new name.
    2. Set the description of the shared movie: Click in the Description field, and type new text.
    3. Set tags for the shared movie: Click in the Tags field, and type tag names separated by commas.
    4. Set the resolution of the shared movie: Click the Resolution pop-up menu and choose an option.
  3. Click Next and verify the file name and where you wish to save it.
  4. Click Save.

Resources to help with your digital story

Link to Guide: Record Audio with AudacityLink to Guide: Create a Video Using WeVideoLink to Guide: Find audio and images for remixing

Suggest an edit to this guide

This work is licensed under a Creative Commons Attribution-NonCommercial-ShareAlike 4.0 International License.